
")
If you are a student of a federal tertiary institution or a state-owned university in Nigeria and you are looking for a step-by-step guide on how to easily apply for NELFUND student loan without any hitches, this guide will help you navigate the application process, from setting up an account to submitting your loan request, with accompanying images for each step.
Qualification To Apply For The Student Loan
Before delving into the application process for the student loan, it is crucial to verify your eligibility. The student loan program is specifically available to Nigerian students attending federal government-owned tertiary institutions in Nigeria.
WARNING!!!
Before you fill any information, especially your name, make sure that you first verify how your name is arranged on your Bank Verification Number (BVN) and JAMB. This is very important because a mistake will delay your application progress. Moreover, it is difficult to access NELFUND support agents because of the high volume of complaints that they handle daily. Again, doublecheck all your details and ensure they are correct because you will not be able to edit your name once it is registered on the data base. Good luck!!!
Steps To Apply For Student Loan
Below is a step-by-step breakdown of how to successfully apply for a NELFUND student loan:
STEP-ONE
1. Create Account
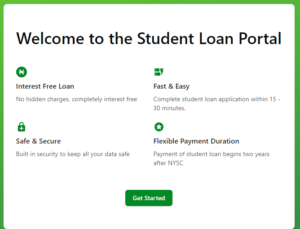
You need to first create an account to be able to apply for a student loan. Visit www.nelf.gov.ng

- Click on “Apply Now” and then “Get Started.”
- After clicking “Get Started,” you will be asked to indicate whether you are Nigerian or not.
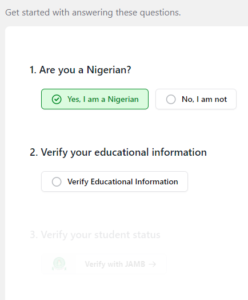
Please be aware that if you indicate that you are not Nigerian, the process will automatically stop as the funding is specifically for Nigerian students. To avoid being locked out of the website, select “Nigerian” as your nationality.
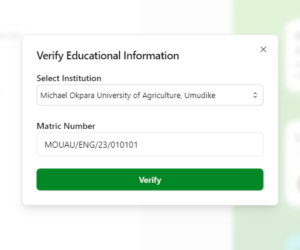
- Fill in your educational information (that is, the name of your institution and your matriculation number).

If you receive a message after verification advising you to contact your institution for information updates, simply click on “Continue.” Don’t worry about it. Furthermore, you may likely encounter pop-up messages telling you that your internet connection is weak. Keep trying if this happens.
Meanwhile, it is advisable to use a laptop or PC (desktop computer) and a Chrome browser when applying for a student loan.
- Next, verify your JAMB number and your date of birth.
Make sure that your JAMB registration number and date of birth are accurate. If you receive an error message about a weak internet connection when you click verify, keep trying. If your details are correct, the verification will eventually go through, and you will see your image and name appear.
- To complete your account creation process, click on “continue to create your account.”
STEP-TWO
2. Confirm Your Login Information
Once you get to this step, you’ll be asked to:
- Enter your NIN for the system to automatically verify it. Once it is confirmed, your name will appear in the box where you fill in your NIN.
- Use only an email address that is linked to your NIN, because no other email that is not linked to your NIN will work.
- Create a strong password that will be a mixture of at least one capital letter, lowercase letter, or special character.
- To create an account, click on “Create Account” and keep trying if you see error messages. Your correct information will be accepted eventually.
After that, you will get a verification link in your email. Go to your email box and click on the link to go to the login page.
General Issues Experienced By Student Loan Applicants And How To Resolve Them
STEP-THREE
3. Login And Profile Completion
- Enter your email address and the password that you created in step 2.
If you receive messages like “Invalid login details” or “wrong email or password,” even though you are confident that the information you entered is correct, just be patient and try logging in again later. If the details you provided are accurate, you will eventually be able to successfully log in.
Once you are logged in, do the following:
- Fill in your name as it is written and arranged in your BVN and JAMB, phone number, address, and state of residence.
- Next, you will need to enter your educational information, such as the university you attend and your matriculation number. Once you have entered this information, the system will automatically generate details such as your program type, academic session, course of study, department, and level.
- Next, proceed to the account details section.
To provide your account details, you must input your BVN, bank name, and bank account number. Note that the account provided will be the one that the N20,000 upkeep will be sent to. Therefore, make sure the account number is yours.
How To Resolve Nelfund Student Loan Bank Verification Fail Issue
After completing your profile, click on “complete profile creation.” You will then be taken to a new page with a message saying, “Congratulations on updating your student loan portal profile.”
STEP-FOUR
4. Apply For The Loan
- Here, click on “Request Loan.” The loan application involves three steps.
- Decide if you would like to receive an extra maintenance allowance of N20,000 per month in addition to the tuition fee loan. If you want the monthly upkeep, tick the box under it.
- Upload your school admission letter (required) and school ID card (optional). Files should be in JPEG or PDF format.
- Next, you will see your school fees. However, if your school fees have not been uploaded by your school, contact your school or wait until your school uploads the fees. If you see your fees, click on “Submit Application,” and you are done.
After submitting, review the final page. You will receive a notification once your loan is approved.
Leave a Reply